Think of MCP like a USB-C port for AI applications. Just as USB-C provides a standardized way to connect your devices to various peripherals and accessories, MCP provides a standardized way to connect AI models to different data sources and tools.-Anthropic
Learn more about the Model Context Protocol in Anthropic’s official documentation
The Linkup MCP server is compatible with any MCP client, such as Cursor or Claude
Desktop. Choose between local installation or our hosted endpoint based on your needs.
/search API for any MCP client. For example, it can be integrated with Anthropic’s Claude:

Local MCP
Run the Linkup MCP server locally using our official packages.Prerequisites
To use Local MCP, you need:- A Linkup API key
- Python (v3.8 or higher) and uv (0.6 or higher) OR Node.js (v20 or higher)
Get your API key
Create a Linkup account for free to get your API key.
Setup Guide
- Claude Desktop
- Cursor
1
Check Prerequisites
Before you begin, ensure you have Claude Desktop correctly installed.
2
Configure Claude to use Linkup MCP
You need to edit the Claude configuration file to enables it to connect to MCP servers. Don’t worry, the configuration is really straightforward and is the official way to do it.Add the appropriate configuration based on your installation method:Replace
{LINKUP_API_KEY} with your actual Linkup API key.3
Start Using MCP on Claude
- Restart your Claude Desktop application
- Look for the hammer icon at the bottom right of the text area
- Click the hammer to see available MCP tools
-
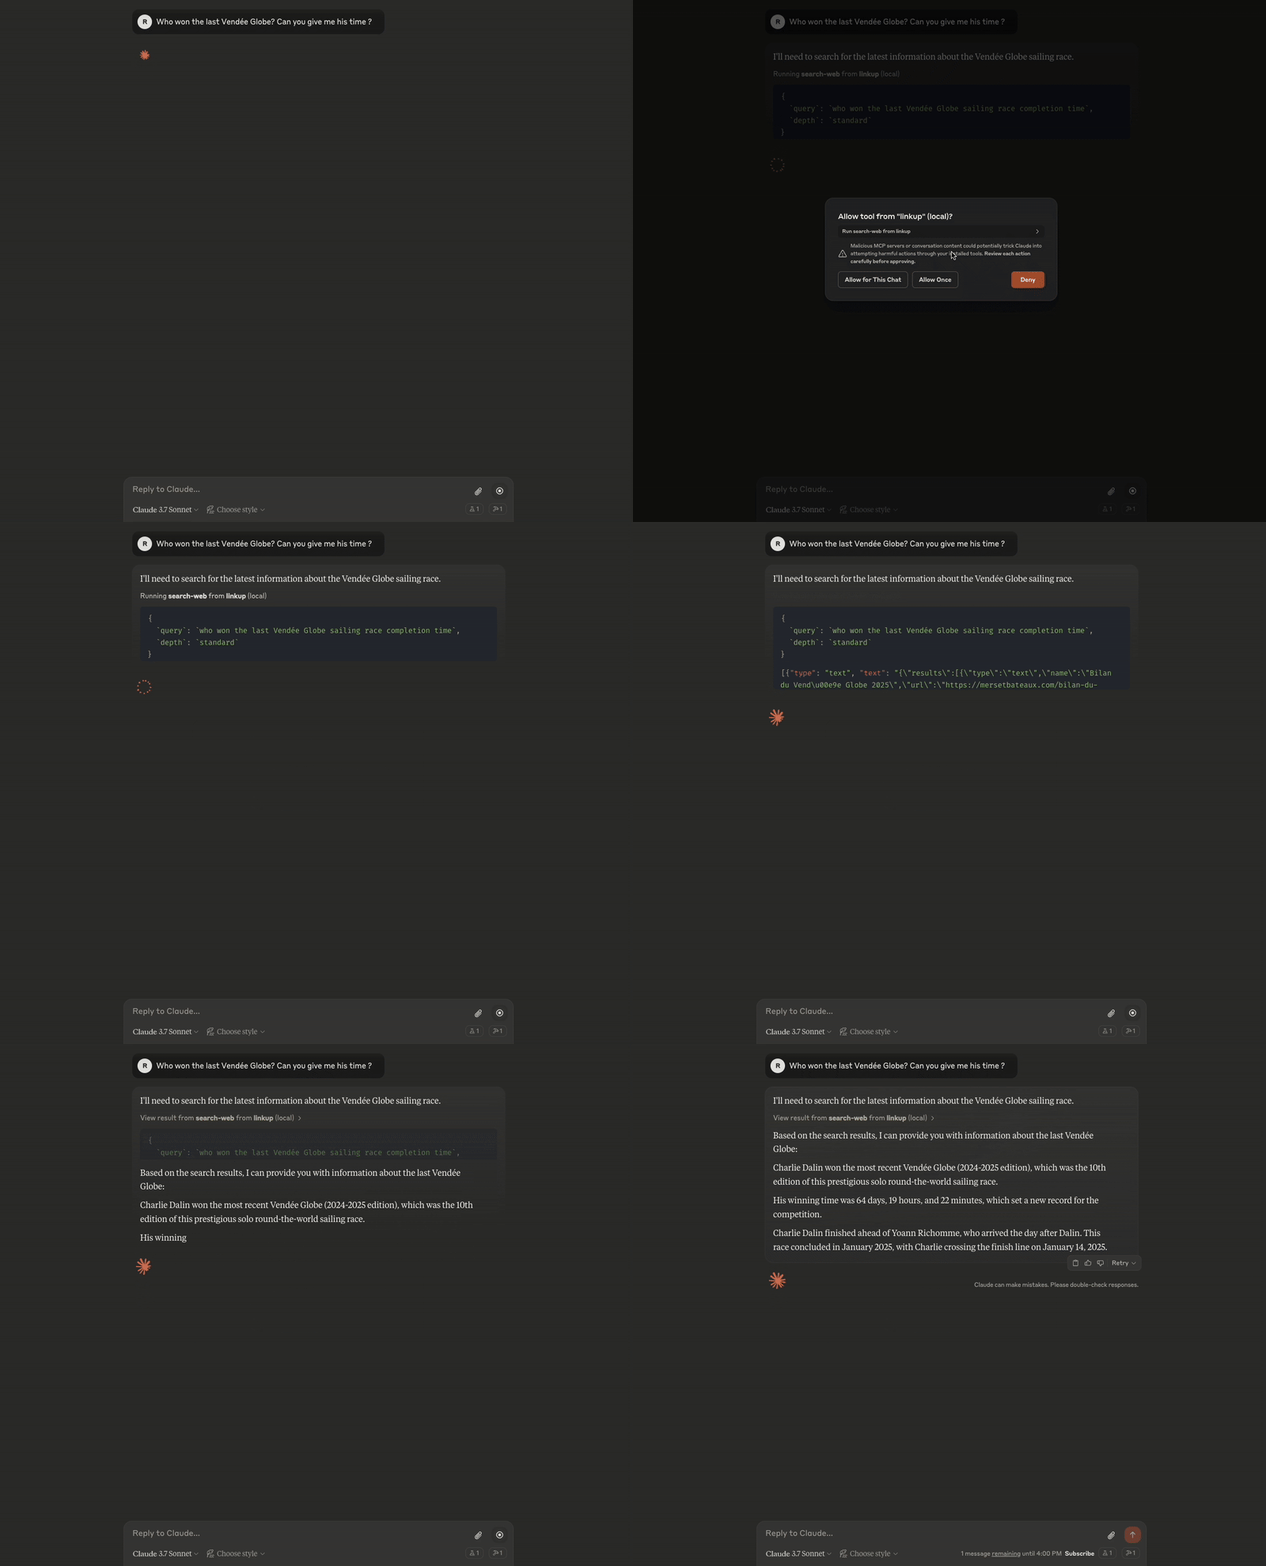
Start asking questions like “Who won the last Vendée Globe? Can you give me his time?”


The Linkup MCP tool will automatically search through the internet to find grounding information to support Claude’s generation.
Remote MCP
Use our hosted MCP endpoint for a quick setup without any local installation.Prerequisites
To use Remote MCP, you need:- A Linkup API key
- Any MCP client that supports SSE (Server-Sent Events) connections
Get your API key
Create a Linkup account for free to get your API key.
Endpoint Information
Our hosted MCP server is available at:Authentication Methods
You can authenticate with your API key using one of two methods:-
Query Parameter (works with all clients):
-
Authorization Header (client support varies):
Client Configuration Examples
{LINKUP_API_KEY} with your actual Linkup API key.
Security Note: When using query parameter authentication, your API key will be visible in URLs and logs. Use header authentication when your client supports it for better security.
When to Use Remote MCP
Remote MCP is ideal for:- Quick prototyping and testing
- Environments where package installation is restricted
- Teams wanting centralized MCP management
- Reducing local resource usage
Facing issues? Reach out to our engineering team at support@linkup.so or via our Discord or book a 15 minutes call with a member of our technical team.

